So as not to interfere with work
If you share your computer with family members or children, it’s hard to do without a separate account for each user. Otherwise, you run the risk of bookmarks with your favorite TV series to find slimming blogs or sites with cartoons. Today, let’s tell you how to create a separate account for a family member or child on your Mac.
First of all, go to the “First System settings » → « Users and groups and make sure you log in under the admin account. Then click on the lock icon, enter the password get ready to create a new account.
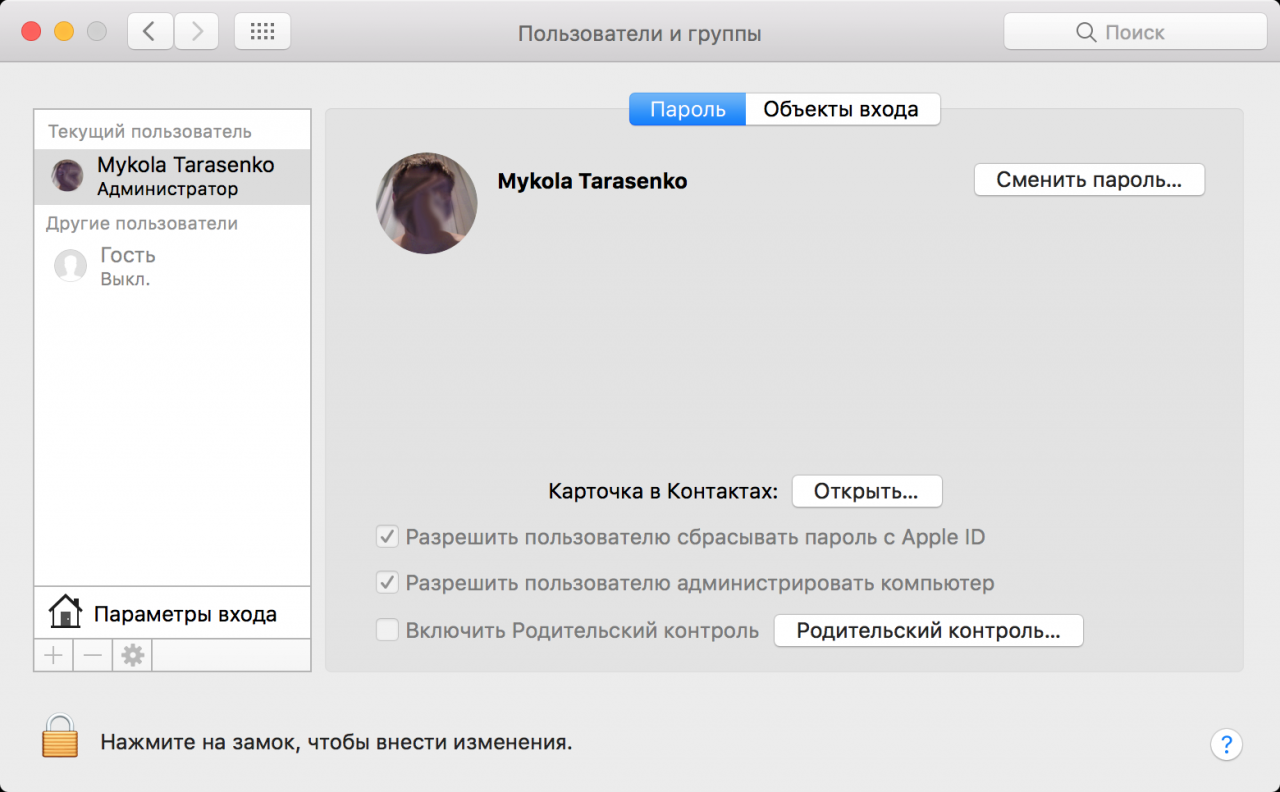
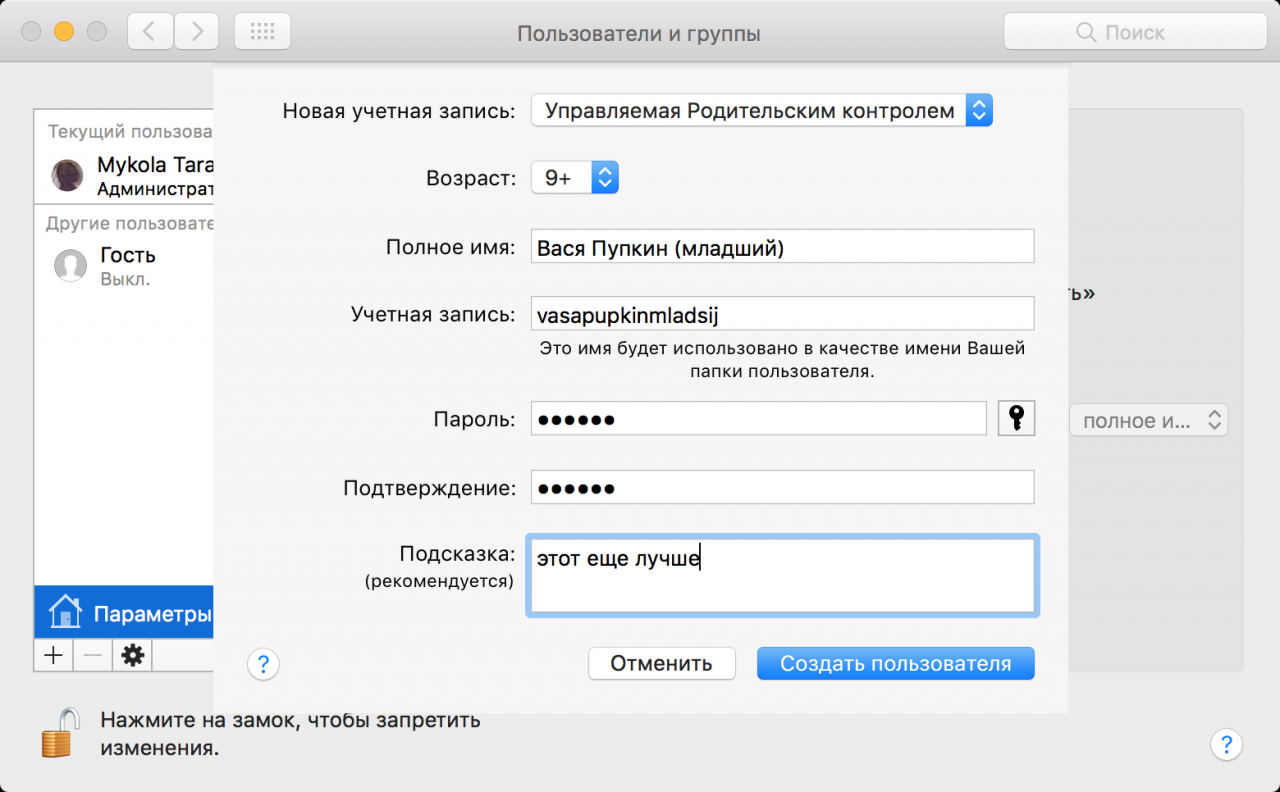
In the left corner of the window there is a sign + Click it and select the type of account you plan to add. We are interested in the first three options: Administrator », « Standard and Managed by Parental Control ».
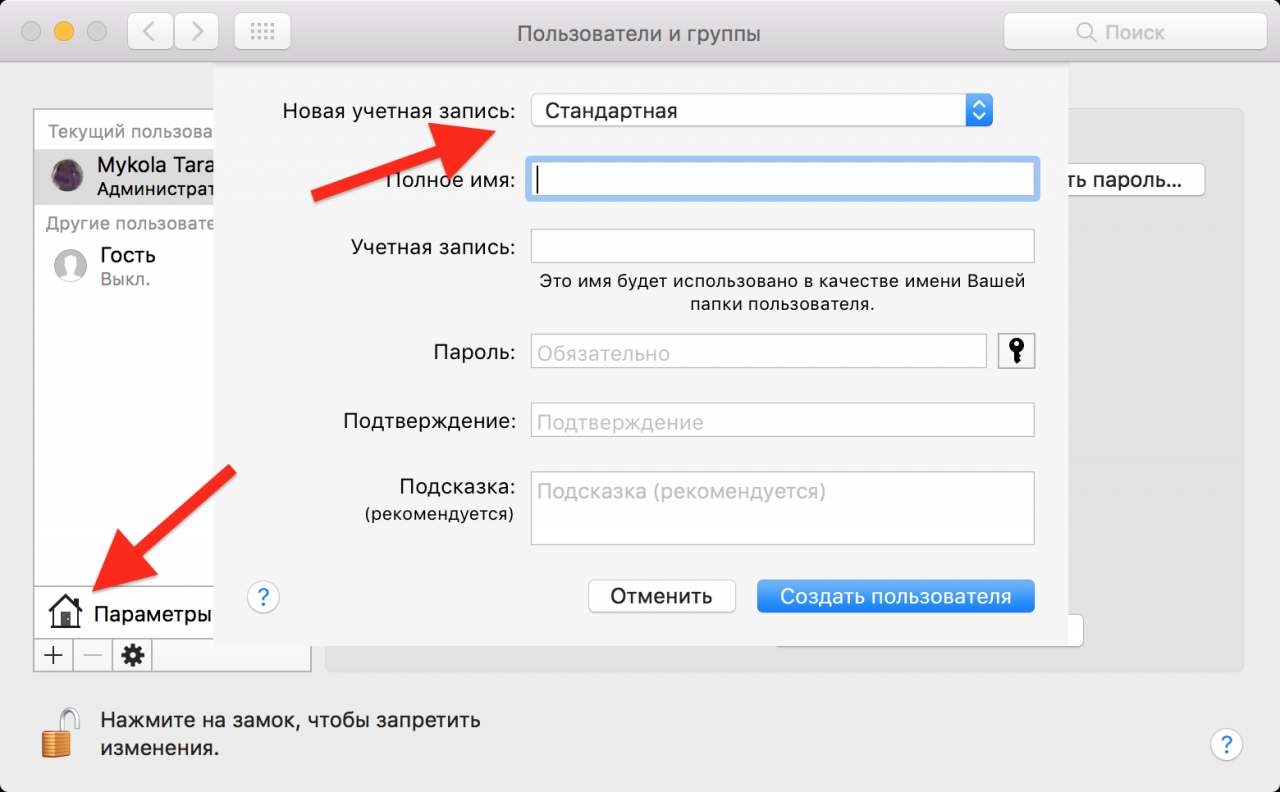
If you create an admin account, a relative or smart child will be able to add and delete users (you included), install programs, and change your computer’s general settings. That’s why it’s better to choose the option Standard or Managed by Parental Control ».
To allow a new user to manage your account, select the Standard type so your family member won’t be restricted in your computer rights.
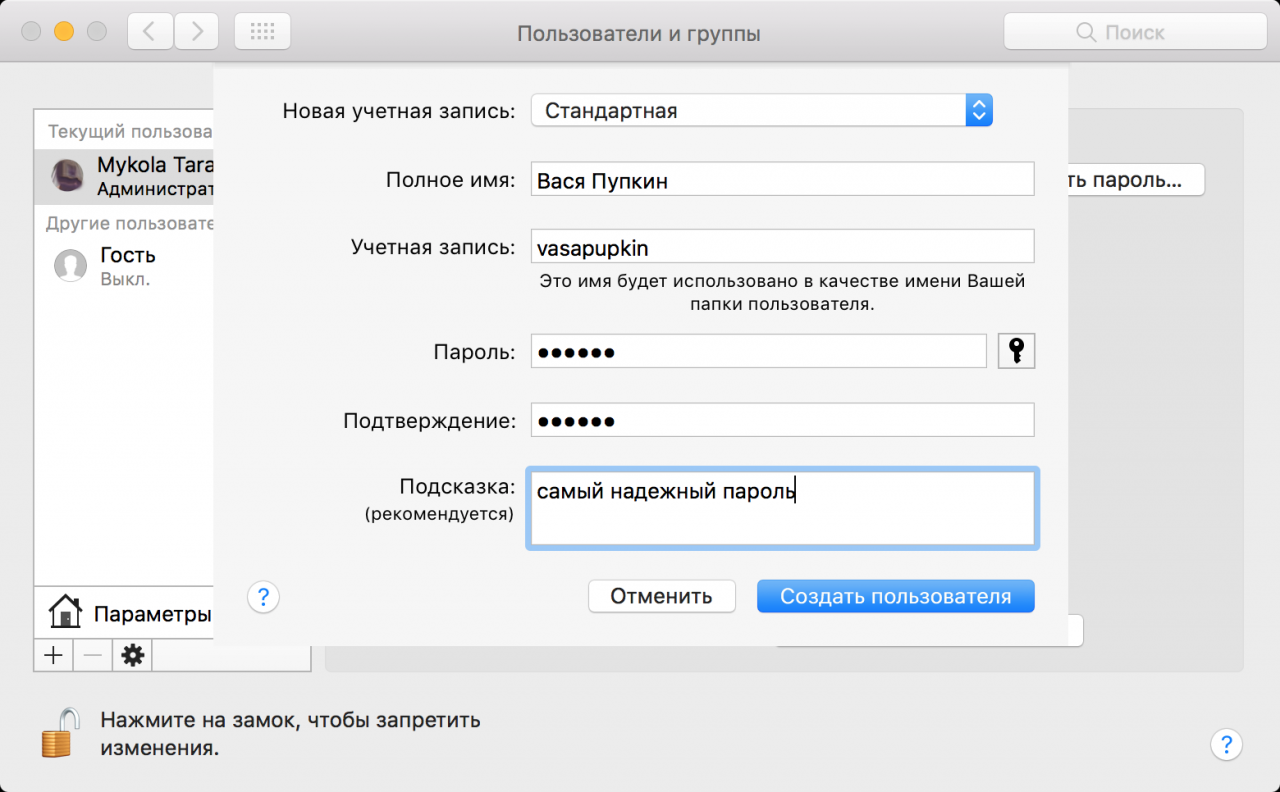
It’s better for children to use the option Managed by Parental Control ». This way you can limit access to unwanted content or set the time your child has to work with your computer.
In an ideal world, every user in the family has their own device. However, if you don’t want to spend money buying a new computer, individual accounts are also a good option.
Know and use:
Put 5 stars at the bottom of the article if you like the topic. How to create a separate account for a family member or child on a Mac

Leave a Reply