
For active users of Apple’s technology, the iTunes library sometimes grows to incredible sizes. As a result, it starts to take up a lot of space on the main disk, which is especially unpleasant when it comes to the SSD. Transferring the iTunes library to another disc, fortunately, is not difficult.
Step 1. Start iTunes and go to the menu Edit » → « Settings ».
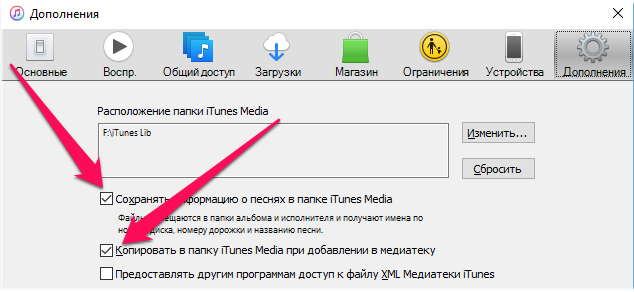
Step 2. On the tab Supplement activate the points Save song information in iTunes Media and Copy to iTunes Media when you add to your library ».
 Step 3. Click on the button Change to the right of the field, Location of iTunes Media folder ».
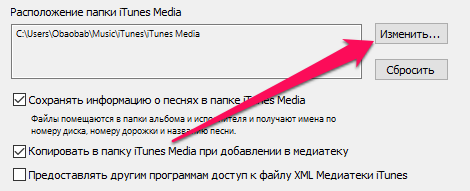 Step 4. Select a folder that will store your iTunes library on another disc and click Choosing a folder ».
Step 5. Click Ok to save the settings.
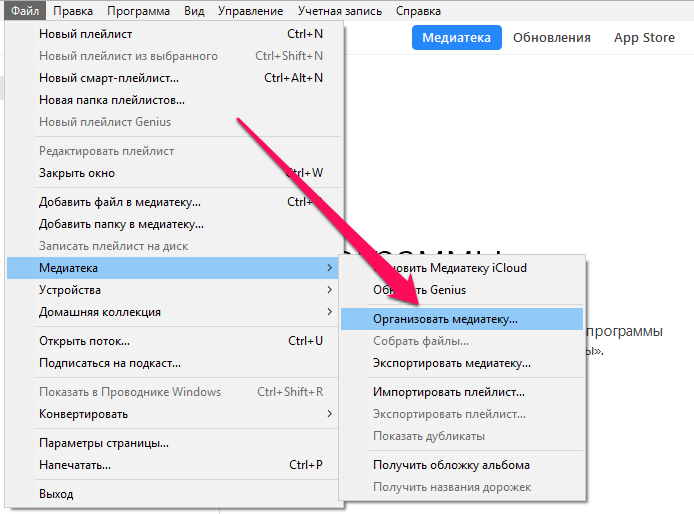
Step 6. Go to the menu File » → « Library and select the item Organize a library ».
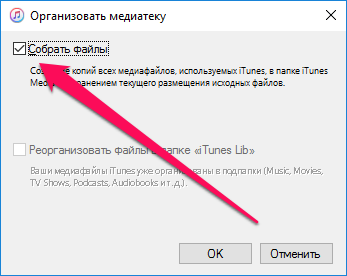
 Step 7. Tick the item Collect files and click Ok ».
 Ready! Your media library has been successfully copied to another disk. Yes, it is copied, not moved, so if the purpose of transferring the library was to free up space on the disk, the old library files must be deleted.
To do this, you need to remove the folder iTunes Media that is located along the way:
Important! You only need to delete the iTunes Media folder. The root iTunes folder can never be deleted, otherwise the previous media transfer will be reset.
See also:
Put 5 stars at the bottom of the article if you like the topic. How to transfer an iTunes library to another disc
Leave a Reply