
A set of instructions for a quick start.
Backup is the lifeline that helps you stay away from work documents, family photos, and favorite games when your hard drive breaks one day. The advantage of Maccomputers is that you can set up backups in a few clicks and without dancing with a tambourine. Today we tell you how to start using Time Machine and what it takes.
Open the menu first System settings and find the item Time Machine Below.
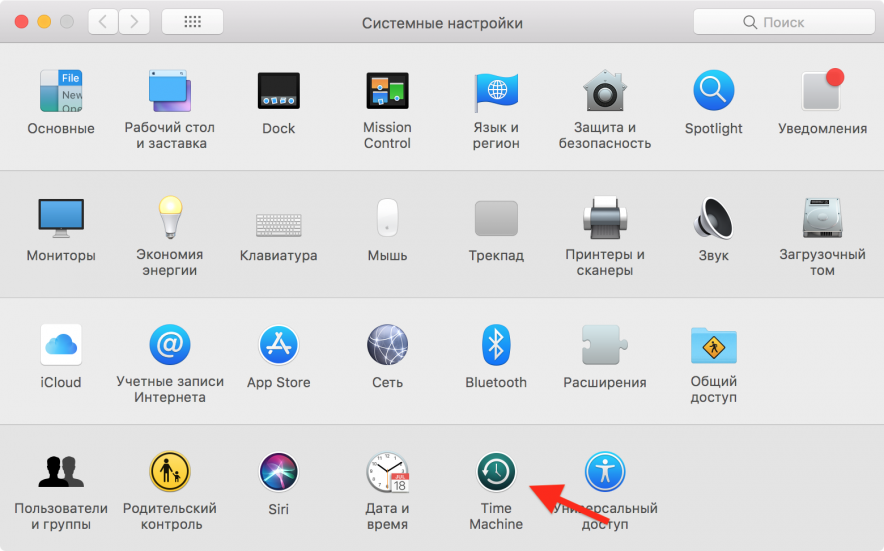
Important! To back up, you’ll need an external drive connected via a USB connector or Thunderbolt. Other options include an AirPort Extreme router paired with a hard drive, a Time Capsule, or a macOS server. Make sure your device is on and running.
Time Machine’s options menu is simple. In it, you can choose a drive for backups, set up automatic creation, display the feature in the menu bar and see usage statistics.
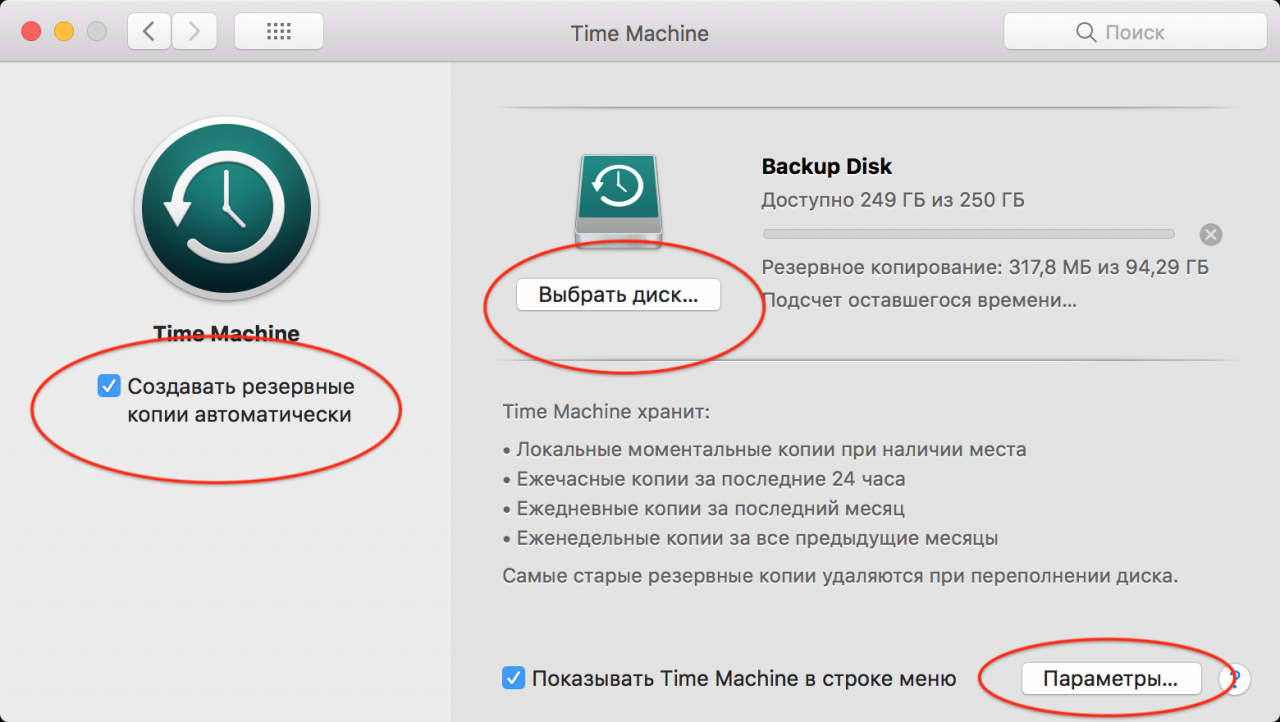
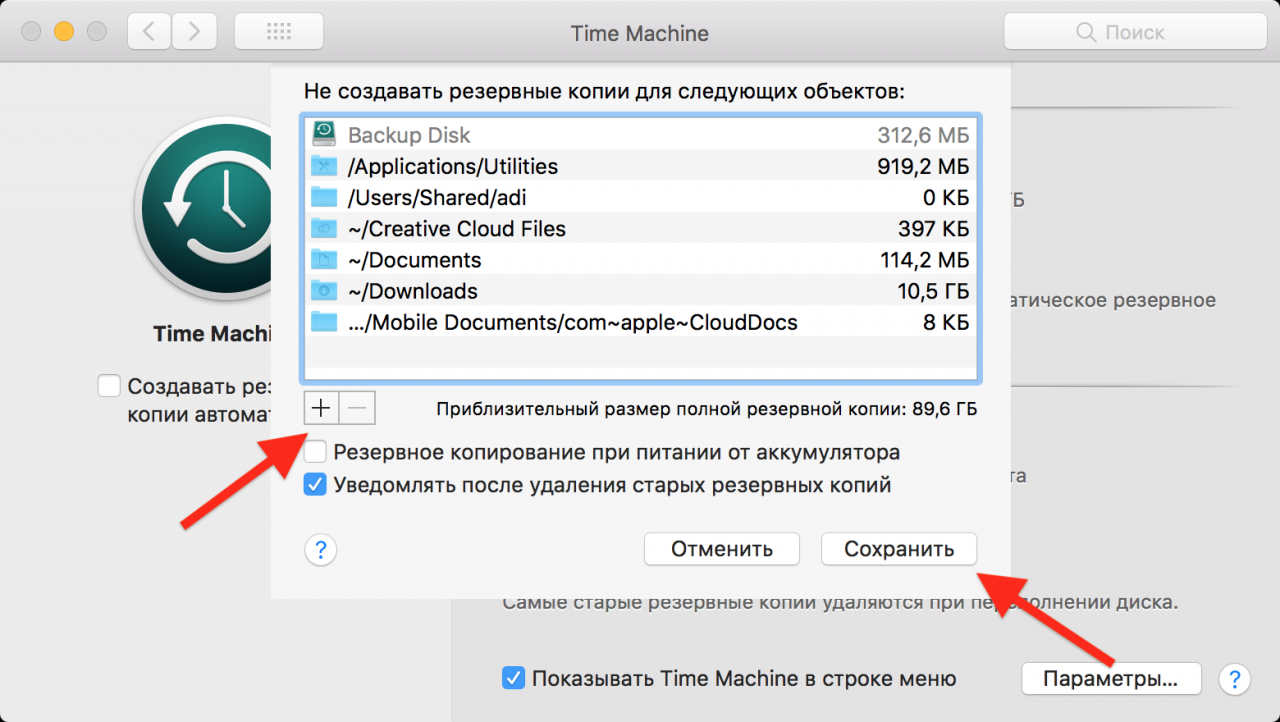
Before you start the backup process, open it The options #8230. and exclude from the backup directory that you don’t need backups. For example, if you use iCloud Drive and sync files from your desktop and document folder with all your devices, there’s no point in backing up time Machine.
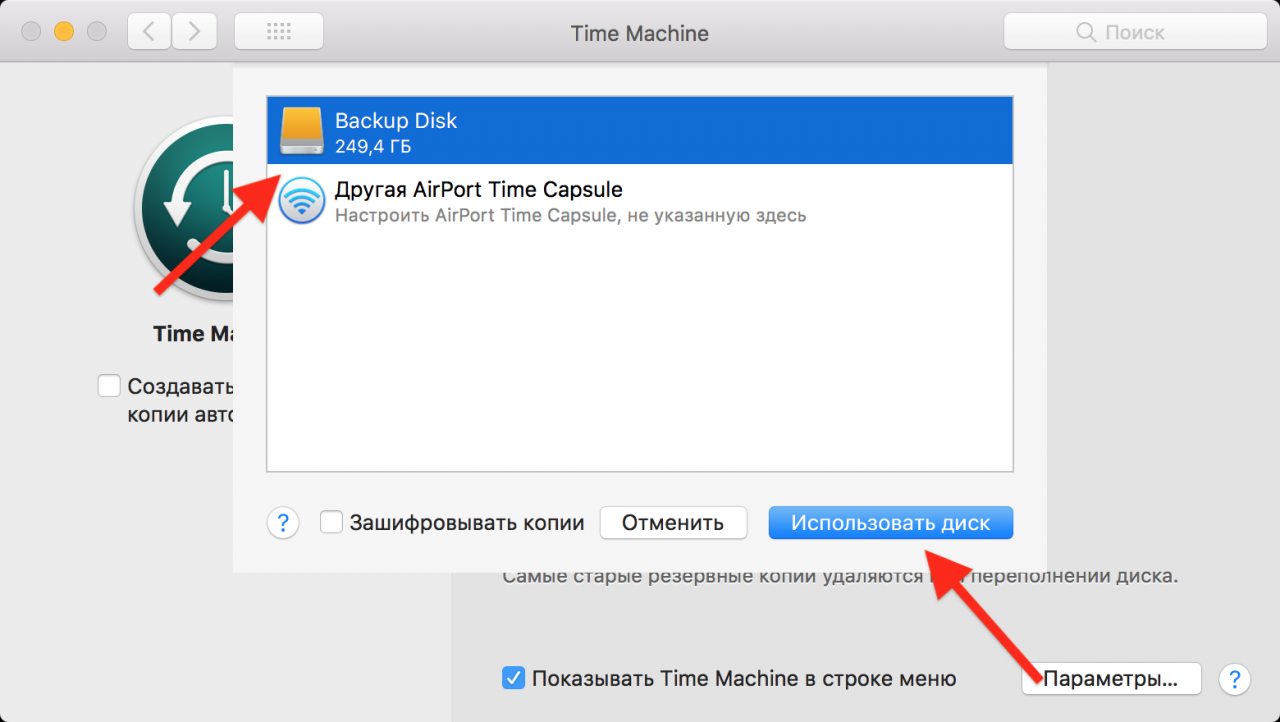
When you’ve identified the backup data, click on the “button Select the disk #8230; then find a suitable one in the list of available devices and click Use the drive ». If you’re worried about data security, tick it off Encrypt copies ». Then without a password, no one will be able to access your backup. Note that this backup is done a little longer.
The speed at which you create a backup depends on the amount of data, the type of connection, and the speed of the external hard drive. When the backup is ready, you’ll see a notification.
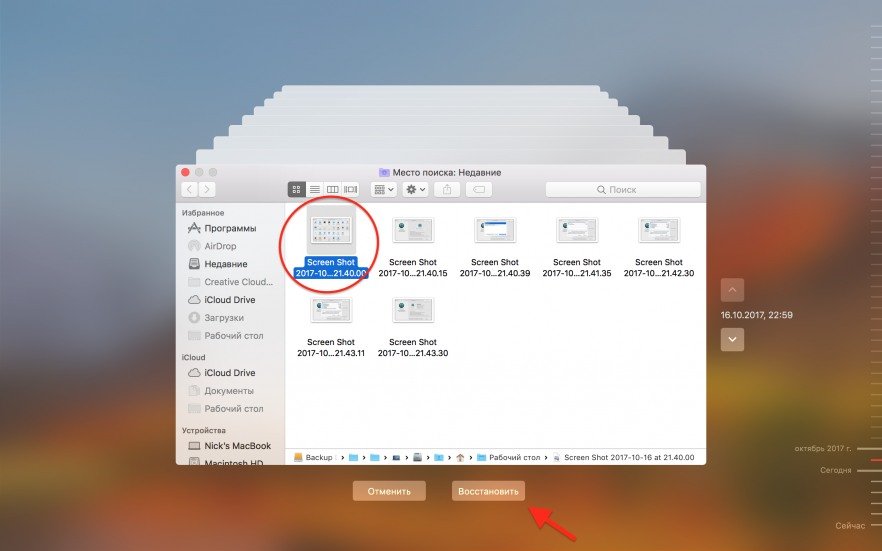
If you delete the files you want, just plug in the drive, click on the Time Machine icon in the menu bar, and select “The item. Sign in to Time Machine ». Flip through the backup list, find the deleted file and click the “button Restore ». The lost file will then reappear in the folder from which it was removed.
It’s laziness to back up, but when you accidentally delete an archive of photos for articles or an important document, you start to understand their value. Hopefully today’s instructions will help you not lose data on your Mac.
See also:
Put 5 stars at the bottom of the article if you like the topic. How to set up Time Machine on a Mac to make regular backups

Leave a Reply