AirDrop is one of the most rarely used functions by owners of apple technology. It is not deserved, because AirDrop allows you to transfer the most quickly and conveniently different data from the Mac to the iPhone or iPad bypassing iTunes. Also familiar with AirDrop only superficially? This instruction will tell you all the features of the feature.
Step 1. Turn on AirDrop on your Mac. To do this, select the Finder menu line item Transition » → AirDrop and turn on Wi-Fi or Bluetooth. If one type of connection is already enabled, the AirDrop feature is also active
 Note: AirDrop is only supported by these Mac models:
Step 2. Turn on AirDrop on your iPhone or iPad. To do this, open Control point and click on the item AirDrop . Here you can specify from whom you want to accept the files – only from contacts, or from all
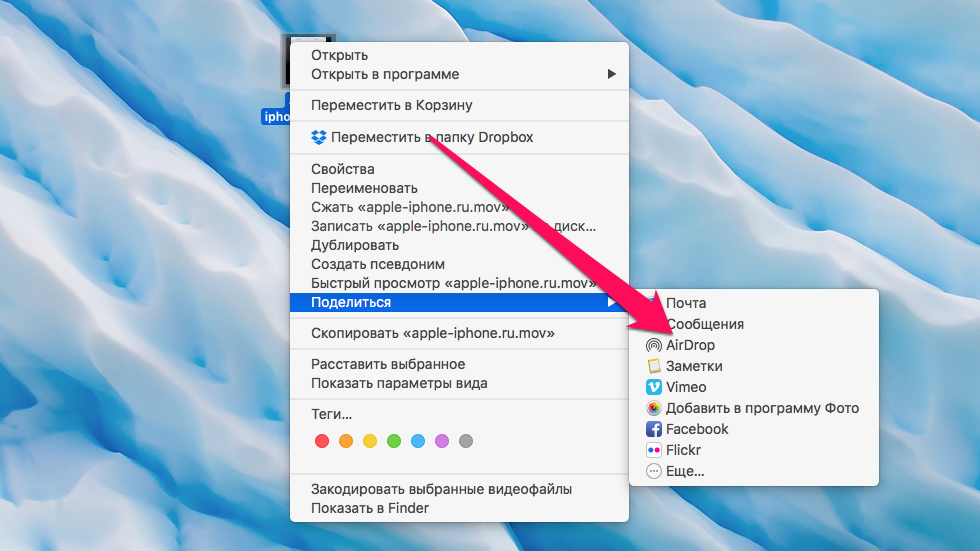
 Note: In order for Mac files to be transferred successfully to iPhone or iPad, the mobile device’s display must be in active condition. Otherwise, communication between devices may be lost.
Step 3. On Mac, select a file you want to drop on your iPhone or iPad via AirDrop
Step 4. Click on it with the right button and select the item Share » → AirDrop
 Step 5. In the open window, select the recipient
Step 6. On your iPhone or iPad, accept the file you send and specify the app where it will be stored
This is the simplest way you can throw different files from your Mac to your iPhone or iPad right through the air. If you need to reset a few files, it’s best to select the Finder menu line item. Transition » → AirDrop and drag the right files to the target device icon. In this case, you will save yourself from having to constantly turn to the contextual menu.
See also:
Put 5 stars at the bottom of the article if you like the topic. How to transfer files from Your Mac to your iPhone or iPad via AirDrop

Leave a Reply